Fast farming requirements
The fast method uses ten damage fleets that attack first and defeat each enemy stack in one hit, with four placeholders to put them in the required starting positions.
- Ten captains with at least 296 Velocity. The recorded enemy captain stat for U22 is 295. The guide recommends aiming for around 300 as you develop your captains.
- Ten thermal damage fleets: above 1,300 displayed attack, preferably 1,500+, using approximately 1,000 ships per occupied stack as the starting point.
- At least four cells of movement for each damage fleet.
- Four placeholder fleets with zero movement, or a captain below 296 Velocity. The fast-method guide allows very small placeholders, even a single ship.
Adjust ship counts to your build, captain and effective stack limit. The attack values and stack counts are a tested starting point from the contributor’s guide; confirm that your own fleets defeat stacks in one hit.
Check the setup before using unshielded fleets. Rixa’s cheap damage build has no added shields. Its safety depends on the correct placements, sufficient Velocity and enough damage. If you are still developing these, use the protected approach below.
Choose fleets in this order
These numbers are the order in which you select fleets on the mission’s fleet selection screen. They identify starting positions on the mission map, rather than the nine ship slots inside a fleet.
| Selection number | Fleet role |
|---|---|
| 1 | Damage fleet · 296+ Velocity · 4+ movement |
| 2 | Damage fleet · 296+ Velocity · 4+ movement |
| 3 | Damage fleet · 296+ Velocity · 4+ movement |
| 4 | Placeholder fleet · zero movement or captain below 296 Velocity |
| 5 | Damage fleet · 296+ Velocity · 4+ movement |
| 6 | Placeholder fleet · zero movement or captain below 296 Velocity |
| 7 | Damage fleet · 296+ Velocity · 4+ movement |
| 8 | Placeholder fleet · zero movement or captain below 296 Velocity |
| 9 | Damage fleet · 296+ Velocity · 4+ movement |
| 10 | Damage fleet · 296+ Velocity · 4+ movement |
| 11 | Placeholder fleet · zero movement or captain below 296 Velocity |
| 12 | Damage fleet · 296+ Velocity · 4+ movement |
| 13 | Damage fleet · 296+ Velocity · 4+ movement |
| 14 | Damage fleet · 296+ Velocity · 4+ movement |
Damage positions: 1, 2, 3, 5, 7, 9, 10, 12, 13 and 14.
Placeholder positions: 4, 6, 8 and 11.
The document mentions four to five placeholders, but specifies only these four placements. Position 15 is not assigned by this method.
Open the numbered U22 mission map to check starting positions. Check the ten damage captains, movement and stack counts each time you change the setup.
Cheap Starfarer farming build
Rixa recommends a short-range, directional thermal laser build: a “glass” damage ship with little protection. The Starfarer III build uses Dawn Cutting Ray III ×6 and Chronothrust I ×1. Current recorded usage is 244 / 250.
Rixa reports that this example costs less than half the resources and takes about a third of the build time of the Gravemind alternative. Those comparisons apply to the supplied examples.
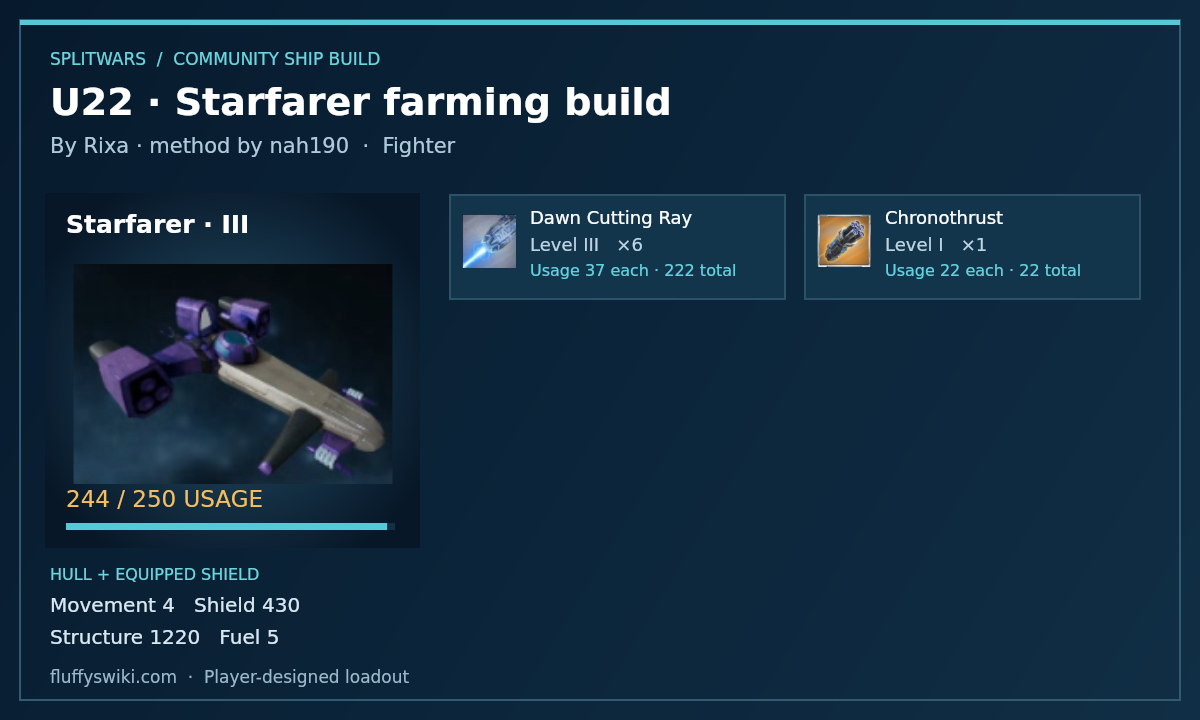
Do not field these exposed damage fleets before meeting the fast-method requirements. While developing your captains, the guide suggests using them as protected centre stacks in fleets alongside Graveminds.
Farming before you meet the requirements
You can start with Graveminds built for U22. Runs will be slower. Initially, you can run without placeholders; Rixa began spreading fleets out with placeholders after building six damage fleets.
- Build protected Gravemind fleets and test what your current captains can handle.
- Once you can field several damage fleets, use the numbered map to spread them out. Keep notes on placements and results as you test.
- For this slower approach, placeholders must be tanks able to survive the mission’s thermal laser and artillery attacks. The document recommends existing U21 tanks if you have them. One occupied ship stack per tank fleet is enough for the described role.
- Improve damage, Velocity and fleet coverage until all ten damage fleets meet the fast-method requirements.
The small, low-Velocity placeholders in the fast method and the tank placeholders in this developing setup serve different circumstances. Use tanks while enemy fleets can still attack your placeholders.
Gravemind build examples
The document shows two stages: before obtaining Chronothrust, Omnibarrier and Dawn Cutting Ray, then after obtaining them. The three images use the wiki ship builder’s hull and module icons, levels, quantities and current recorded usage values.
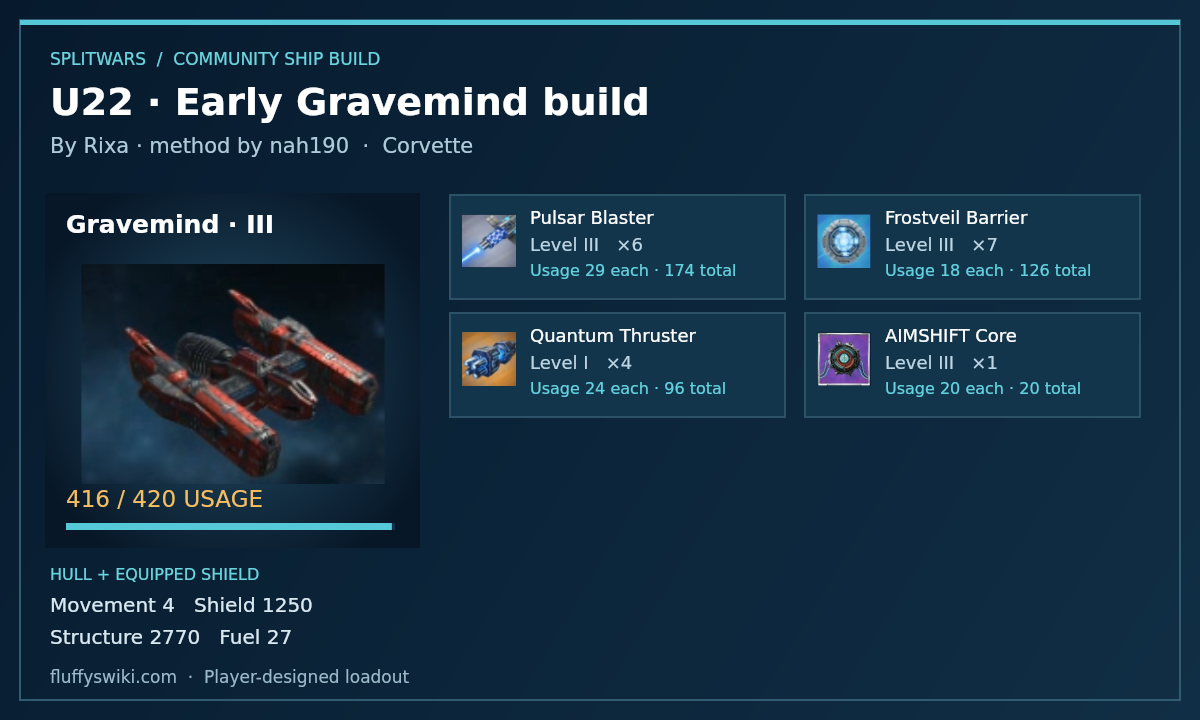
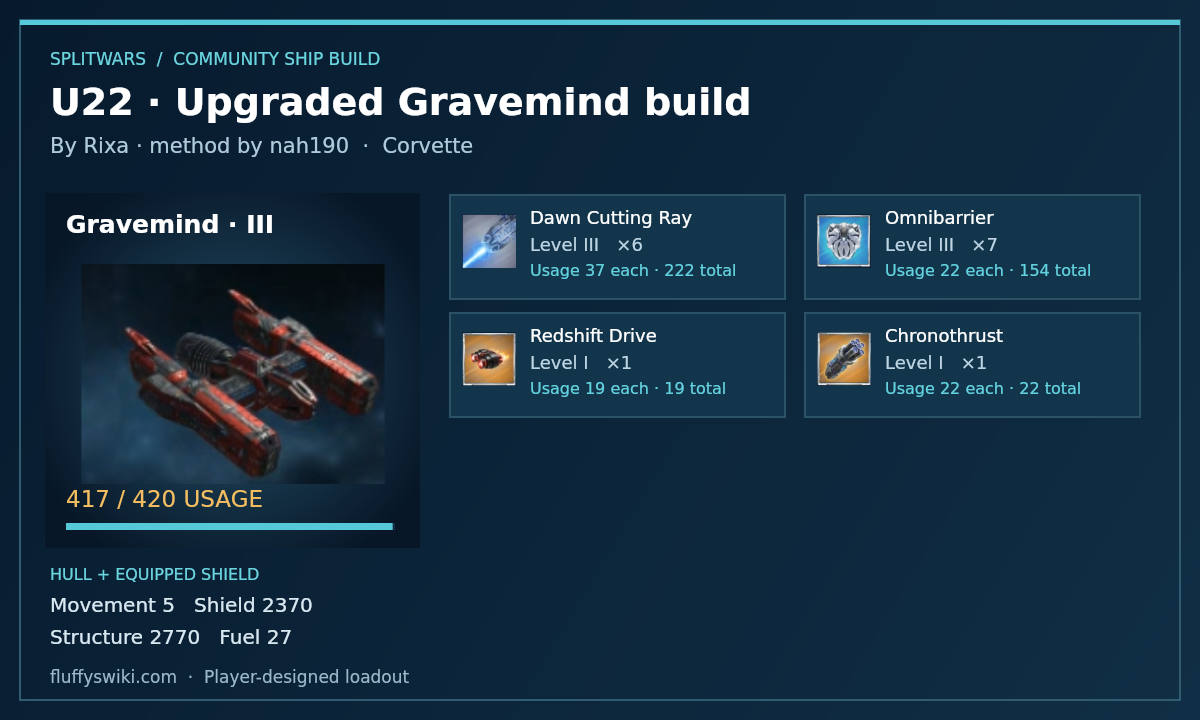
| Displayed example stats | Starfarer | Earlier Gravemind | Upgraded Gravemind |
|---|---|---|---|
| Attack | 1,602–1,818 | 1,140–1,308 | 1,602–1,818 |
| Movement | 4 | 4 | 5 |
| Shield | 430 | 1,250 | 2,370 |
| Structure | 1,220 | 2,770 | 2,770 |
| Fuel | 5 | 27 | 27 |
| Range | 2–5 | 2–5 | 2–5 |
| Build time shown | 19 seconds | 51 seconds | 43 seconds |
The table preserves the totals displayed in Rixa’s original build screenshots. The recreated images use current ship builder data; their usage values may differ from the original loadouts. Applied research, captain bonuses and testing version are not specified. Recent game changes may affect your results.
Rixa suggests that players who have Chronothrust and Dawn Cutting Ray can choose the cheap Starfarer route once ready, rather than building the upgraded Gravemind example.
Prepare your captains and stack sizes
- Use relics to bring captains to around 300 Velocity. As their natural stats grow, move those relics to captains that still need the boost.
- Plan stat rerolls and levelling so your damage captains can reach around 300 Velocity by roughly level 35, as suggested in the document.
- Increase ship counts when needed, using the captain’s effective stack capacity as the reference. Test each captain rather than assuming identical performance.
- Existing thermal glass ships with at least 1,000 displayed attack can be used as protected centre stacks at the maximum effective stack size to reduce rebuilding. This is the document’s reuse suggestion, not the higher damage target for the fast method.
Credits and source
Adapted from the supplied Universal Mission 22 farming document: method by nah190, with the cheap ship designed and tested by Rixa. Rixa supplied all build examples. Added to the wiki on 9 October 2026.
This is a community-tested strategy from the supplied document. The document does not give a testing version or guarantee loss-free runs for every captain and build.
Mission 22 details, rewards and enemy fleets · Ship designer · More mission strategies